At Readercon two weekends ago, I was happily munching on my home-made O-nigiri rice balls, but nobody believed that they I had made them myself. In fact, it’s pretty easy to make the exact replicas of those tasty treats found in 7-11 stores all over Japan, ii kibun! But you do need at least two items not usually found in your typical Asian grocery: rice ball molds, and specialized nori seaweed wrappers with red pull strings. You will see what these look like in the instructions below. (Note: you can also mold the triangular rice balls with your hands if you don’t have a mold, and you can use regular nori sheets to wrap them, but they should be eaten immediately.) These instructions will show you how to make the portable, plastic wrapped rice balls that keep the nori sheets fresh until you eat them…enjoy!
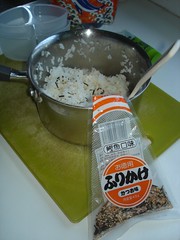
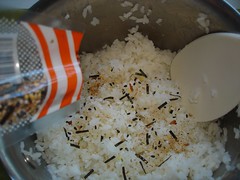
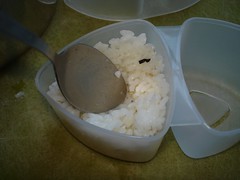
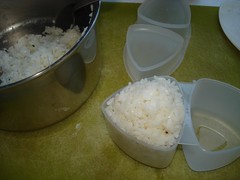
step one: cook rice and let it cool. typically I just cook extra rice and leave it tightly covered overnight, then use it the next morning to make rice balls. you need about 1 to 1.5 cups of cooked rice for each rice ball. stir about 1 tsp of sesame oil into the rice, fluffing it up a bit. the oil keeps the rice from sticking to the sides of the mold. optional: stir into the rice a small amount of flavoring, like roasted sesame seeds with nori bits and bonito powder. this just adds a little interest and zest to the rice.
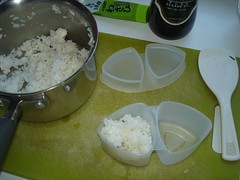
step two: add about .75 cups of rice to one of the rice molds, basically fill the rice mold with loose mounds of rice. use a tsp to pack down the rice so that you create a little basin in the middle, which is where you will pack your yummy ingredients!
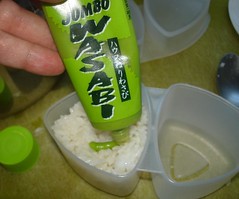
step three: now begin to add the ingredients. in my case I usually start by spreading some wasabi paste in the bottom.
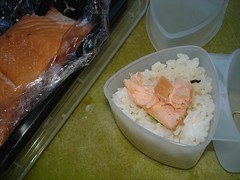
then on top of the wasabi, I put the main ingredients. usually this includes avocado, but in this batch I just used smoked salmon.
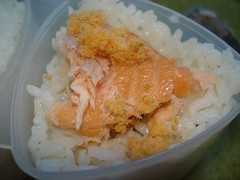
oh man, that’s already looking good! you can jazz it up with some dried fish powder or other delicacies, like umeboshi plum powder, nanami togarashi, whatever you like!
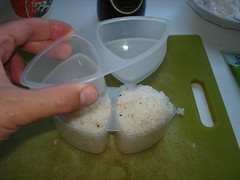
step four: satisfied with your interior mix, you cover up the whole with a mound of rice, about .5 cups. the rice should be sticking up out of the mold but sort of rounded down towards the edges (which will result in less mess when you are pressing the mold. Okay, now fill up the other half of the mold using exactly the same steps one two and three, then cover the second rice ball up so that you have two mounds in both halves of the mold ready to press.
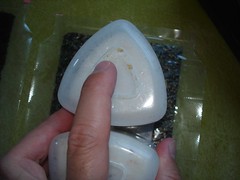
step five: position the top part of the rice mold (the presser) with the convex part sticking downwards towards your rice ball mounds. line it up so that the edges will fit into the lower part as you begin to press down.
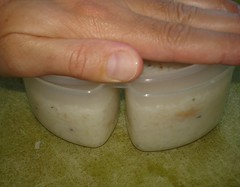
with firm and even pressure, jam the top part of the mold into the bottom part, compressing your mounds of rice and ingredients together into a tight rice ball.
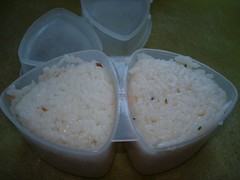
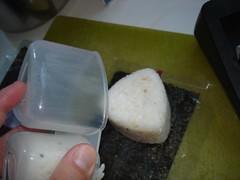
now remove the lid and you will see the excellent rice balls just waiting to be plopped onto sheets of nori seaweed.
step six: to get the really authentic Japan 7-11 style onigiri, you must obtain the pre-wrapped sheets of nori that have their own perforated pull strips. These are pretty hard to find, but H-Mart has a version. the ones shown here were brought from Taiwan by our in-law relatives (hey, thanks SO MUCH for this treat, folks).
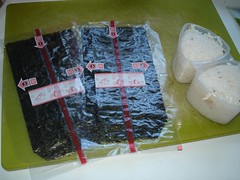
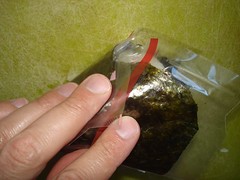
there are usually instructions and arrows printed on the outer plastic layer, showing you how to open the rice balls after they have been wrapped. you want those to appear on the outside of the rice ball, so flip the sheet over for the instructions to face down. then carefully position the first rice ball towards the top edge of the nori sheet, with a pointy end of the triangle near the top edge.
step seven: the last step is to wrap up the rice ball. start by folding the bottom half of the sheet over the top half.
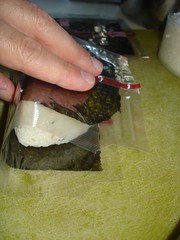
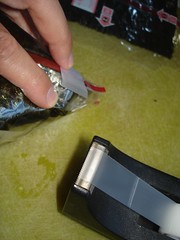
then fold the upper left edge of the wrapper sheet down over the left edge of the rice ball, and fold the bottom left edge of the wrapper back on top of it. repeat the same procedure for the remaining two edges on the right, and apply a small piece of tape to hold the wrapper edges together.
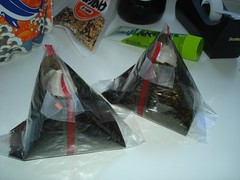
your finished onigiri should like like a triangle wrapped in plastic.
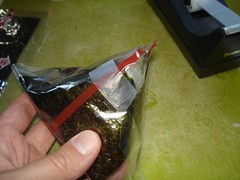
you can make them yourself, and don’t have to be at 7-11 in Japan or Taiwan, or at a special Japanese grocery store like Mitsuwa or Uwajimaya. You’re gonna love ‘em! Even you _u_n-believers who thought I was making it all up!